Things I can't eat:

Allergic to: Peanuts. Tree Nuts. Legumes (includes beans, peas). Seeds. Soy. Raw Fruit. Raw Vegetables.

Sunday, October 19, 2014

GUYS I MADE CARAMEL

I reached into the bucket of caramel corn, and pulled out a big gooey ball of freshly popped caramel coated joy. It was beautiful, and by some stroke of luck, I could eat it. This was the only stand we'd found on the boardwalk that didn't have nuts in their caramel corn. As I reveled in the magic that was caramel corn, a slow, sudden realization came over my mother. 

"NO", she shouted as she smacked my prized popcorn ball out of my hands and grabbed the bucket. My heart fell, and then quickly rose as I understood her actions. "Water!" Someone brought me a water bottle as my mom and I fumbled with the benedryl packaging. I took the pill, and chugged the entire bottle of water. I rinsed my mouth and spit into the garbage, as the bright lights and clanging sounds of the boardwalk filled the night. Exhausted and afraid, I sat on a bench, my entire family watching me with hawk eyes. Someone explained what had happened. 

"They have two serving-windows. The other window is where you get the popcorn with nuts. Your popcorn could have been cross contaminated."

"But they told us it was safe." I replied, beginning to understand that "it's safe" isn't always good enough. I learned that it was up to me to investigate and guarantee the safety of my food, before I ate it. 

That night I went to sleep, scared. I was afraid that, hours later, a reaction may still occur. My father assured me that I'd be okay, but that didn't stop me from falling asleep wondering whether I'd be okay in the morning. 

Boardwalks, fairs, and carnivals are dangerous for food allergies. It's hard to be tempted by the sugary, sweet smelling food. It's awful watching everyone eat the popcorn, except for you. Here's a fun take on caramel corn that you can make at home! 

CARAMEL SAUCE


You Need:
1 cup of sugar
6 tablespoons of butter
½ cup of cream
½ teaspoon vanilla
Dash of salt


Melt that sweet, sweet sugar in a pot over medium heat. Stir constantly with a rubber spatula, lest your sugar burn.


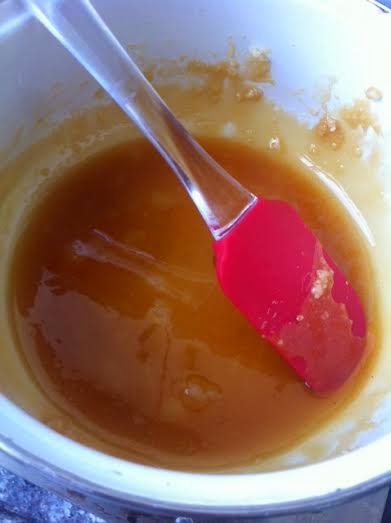
Sugar will start to clump, and eventually melt into a beautiful amber liquid. Once all the sugar has melted, add butter, and stir. It will bubble!


Once the butter is melted and mixed in, SLOWLY pour cream while stirring. Add vanilla. It will bubble more!


After you’ve stirred the cream and vanilla in, let sit on heat for 1 minute. Remove from heat, add dash of salt, and set aside to cool.


Once it’s cooled off a bit, go ahead and pour into jar/bowl/glass/mouth.


You can use this sweet nectar on anything, but for a savory seasonal treat try drizzling over some freshly popped popcorn! Eat popcorn warm, or refrigerate over night!


POPCORN:

You Need:
Canola Oil
½  cup popcorn kernels

Pour oil into a pot, (just enough to coat the bottom).

Add kernels, place lid on top.

Cook over medium heat, shaking every 5-10 seconds.

When it starts popping, shake every 3-5 seconds. (Be careful here, the oil may sneak out from 
beneath the lid! I recommend using a dishtowel, or oven mitts to hold the lid in place while you shake it).

When the popping slows down/stops, remove from heat and set aside. 

For a faster, one-pot Caramel Corn option:

1/4 Canola/vegetable oil
1 Tablespoon of butter
1/8 cup white sugar
1/8 cup brown sugar
1/2 cup popcorn kernels
Dash of salt

Pour oil into pot (should coat the bottom).
Add butter, and sugar. Stir so the butter and sugars begin to melt.
Add kernels, place lid on top.

Cook over medium heat, shaking every 3-5.

Continue shaking every 3-5 seconds while it pops. (Be careful here, the oil may sneak out from 
beneath the lid! I recommend using a dishtowel, or oven mitts to hold the lid in place while you shake it).

When the popping slows down/stops, remove from heat and set aside. Salt it, shake it, enjoy it! 


Friday, October 17, 2014

Sauteed Sweet Potato


You all now know that I am obsessed with the flavors of fall. Once the weather gets a little chilly, I'm working that cinnamon/nutmeg/thyme into most of my recipes. SO much yum.

This is an amazing, totally allergy-free recipe that works great as a side with dinner OR breakfast! (Give me some sweet potato hash with a fried egg and I am in heaven.)

Sauteed Sweet Potato 
Nut-free, egg-free, soy-free! 


You Need:
-Sweet Potato
-Onion
-Mushroom (optional)
-Cinnamon
-Nutmeg
-Thyme
-Butter OR oil. If allergic to dairy, use oil!!!

Melt a tablespoon of butter in a pan. If allergic to dairy, heat oil in pan.

Grab one of those big, fat sweet potatoes and cut it in strips. Or dice it into cubes. Whichever shape makes you happy. Toss in pan.


While those sweet potatoes are cooking, dice a few slices of onion, and a few mushrooms.

When the potato is almost cooked, toss in the onion and mushroom. They take much less time to cook than potatoes.

Season with a dash of salt, pepper, cinnamon, nutmeg, and thyme. Toss in pan, and let cook until potatoes are nice and soft.

Voila! A perfect, healthy, allergy friendly side dish. Goes great with chicken, mixed with pasta, and even topped with a fried egg. This is such a simple, versatile dish! Enjoy!


Mmm...sweet potato and a fried egg.
One of my favorite breakfasts!

NOTE: Nutmeg is not a nut.  That said, if you're uncertain, ALWAYS  check with your allergist!!! Always, always, always!!! 

Thursday, October 16, 2014

Apple Pie Bowl!

Fall is my absolute favorite time of year. The leaves turn, and the air is crisp, and clear. It's beautiful. One of the best parts is definitely the rich, warm flavors that come out to play. Nothing says cozy quite like the foods of fall. Pumpkin, squash, cinnamon, apples, cider, pie...it's all perfect.

My family and I always drive out East on Long Island to visit the pumpkin fields, and apple orchards. We've visited the same farms and orchards every year since my brothers and I were born. Every October we'd run through corn mazes, take hay rides, and climb apple trees. The car would be filled with pumpkins, barrels of apples, mums, and a bouquet of sunflowers. The trip was never complete without a stop at the pie shop. My brothers and I would play at the picnic area, while my parents bought their pies to go. One apple, and one pumpkin. They smelled amazing, but I could never eat them..."just in case."

Now that we're all adults, we can't always get home for pumpkin picking. I live on the other side of the world, and we don't really get fall. I can't get home for pumpkin picking, the leaves don't change, and just finding a pumpkin is a task.

I was really craving a taste of autumn last night, and I just so happened to be attending a little dinner shindig. I found some nice, plump apples at the supermarket and decided to get creative! I had seen cored apples used as a container for tasty mixin's, and decided to try my hand at mini-apple pies. They were amazing, and tasted just like fall. This recipe is nut-free, and egg-free!


Apple Pie Bowl

Ooey-gooey apple pie!


You Need:

Dough: this recipe makes one 9-in pie crust. 
-1 1/4 cups flour
-Dash of salt
-1/2 cup butter
-1/4 cup cold water

Combine flour and salt in a large bowl.
Using fingers, rub butter into flour mixture. (This is easy, just break off small chunks of butter with your fingers into the flour). Mix together with your hands until the mixture looks like crumbs. 
Add water, one tablespoon at a time, stirring together until the mixture forms a ball. Cover with plastic wrap, and place in fridge.

Apples Bowls & Filling: This recipe makes 3 apples.
Apples (How many people are you baking for? That's how many apples you need.)
Cinnamon
Cardamom
Nutmeg
1/2 cup Brown sugar
1/4 cup White sugar
1 tsp lemon juice


Wash apples, place on a cutting board and cut the top off. Easy! 

Next, using a melon baller or a spoon, scoop the inner core of the apple. Set aside the scooped out parts. Your apple should now look like a small bowl. 

Chop up the removed apple bits, and add a teaspoon of lemon juice. Add sugar, cinnamon, nutmeg, and cardamom. Stir together. 

Spoon filling into apple bowls, and set aside. 

Remove dough from fridge, and place onto a floured surface. Dust with extra flour, then press/roll out. Cut your dough into strips, and place onto filled apple bowls in a lattice pattern. Take one long piece of dough, and wrap around the edge to hold the latticed strips in place.

 Sprinkle cinnamon, and a dash of brown sugar on top.

Place apples in the pan, pop them in the oven for about 25 minutes, and you're all set!


Serve with vanilla ice cream, for extra smiles. 

Wednesday, October 15, 2014

Me & My Drug Bag

I consider myself pretty lucky. I've got a long list of allergies, and have never had to use my epi-pen. My parents taught me how to read ingredients. They taught me that if I wasn't sure about something, then I shouldn't eat it. They taught me to be aware of how and where my food was made, and to ask questions. I learned that it was better to have and not need, than need and not have. So, my epi-pen was always by my side. When I was too young to carry it on my own, my mom carried it. Back then, I knew that my allergies were dangerous, and I knew that the big scary yellow shot could save my life--but I was afraid of it. I would get weak knees, and my stomach would churn. Just holding it would leave me lightheaded.

As soon as I was deemed "old enough" I got a lesson on how to use the life-saving auto injector, and started carrying my own.  My dad held out the epi-pen and told me to take it, but I didn't want to. I'd decided that holding it would somehow cause me to have an allergic reaction. Holding it meant I needed it. My dad reminded me that one day, my life may depend on whether I knew how to properly use the epi. So I had to learn. I needed to know how to use it, in case my parents weren't there. I reached out, took the epi-pen and immediately felt lightheaded. I listened as he told me step-by-step, how to use it. We practiced, and soon I was able to hold it without being scared. Soon, I was teaching my friends how to use it--just in case something happened at school.

I was informed, educated, and alert. That's why when I read this article from Allergic Living, I became rather distraught. People don't carry their epi-pens everywhere? I carry two! I buy my purses based on whether there is somewhere to stash my "drug bag"! (That's what I call the little make-up case that carries my epi-pens and medicine).

If you have a life-threatening food allergy and you're not carrying an epi-pen, then you're putting your life at risk. If you're allergic, carry. If your child is allergic, carry. Most importantly, educate. If you're allergic, tell your friends. Teach them how to recognize symptoms of a reaction, and make they know how to use the epi-pen. If your child is allergic, teach them how to be vigilant. Teach them that it's okay, and that they should never feel embarrassed to speak up. A few weeks ago, I went to get a sandwich for lunch and the guy had to make it three times before he made it safely. Unless that thing is made with clean gloves and a clean knife, on a clean surface, then I'm not touching it.

Vigilance is key to our survival, but accidents do happen. Carry your epi-pen because antihistamines won't cut it, and because you deserve to live, and eat worry-free.

"Every second counts"


Sunday, October 12, 2014

Happy Sunday!

Hey ya' crazy nuts, how's it going?

I didn't sleep very well last night, so by 4 AM I knew there was no turning back. My day had begun, so I might as well bake. I attempted a batch of my nut-free oatmeal breakfast bars, which I've been tinkering with for a few weeks. I have a long commute to work, so I like to eat them on the bus. And sporadically through the day. And by that I mean I eat them all day. They're delicious, healthy, and SO easy to make! I haven't quite perfected the recipe yet, but once I do, you guys will be the first to know!

I live across the street from a bakery, and there's another up the road. The smell of fresh bread and pastries often wafts through my window, leaving me with my mouth watering, imaging what that chocolate puff pastry actually tastes like. Man, I love food. I am thankful for my allergies though, because it's forced me to learn how to make certain things on my own. Sometimes, I really enjoy a little bread with my breakfast/leisurely brunch/lunch/dinner/dinner party/snack-fest. I can't really find something that I love, and feel safe eating. Truth time? Multigrain bread scares the crap out of me. Store bought bread is out.  What about the pull apart, toss in the oven dough? Most of those are probably fine, but I always feel 100% safer if it came from my hands.

So after a little bit of research, and a four day eating extravaganza in Charleston, South Carolina (thank you to my brother, Dave, for feeding me and putting up with my four day hunt to find fried chicken that wasn't cooked in peanut oil), I decided to make biscuits. It was perfect. A rich, yummy bread that goes well with just about anything.

I use Alton Brown's Southern Biscuit Recipe, because well, it's so dang perfect. The only difference is that I substitute shortening for butter. I usually wind up using 4 or 5 Tablespoons of butter. Here's the secret to perfect biscuits: do not manhandle the dough. Seriously, no kneading. If you want a nice, fluffy biscuit then be gentle. Handle with care, and tell the dough how beautiful it is.

This recipe is always a hit, and it's so easy to throw together. Make it before work, and toss them in the oven while you're in the shower. Fresh, nut-free, 100% guaranteed safe bread? It's a dream come true.

Here's the recipe, courtesy of the Food Network. Enjoy!!

Southern Biscuits, Hold the Nuts!

Saturday, October 11, 2014

A Healthy, Hearty Breakfast

When I'm in a hurry, the most I usually have time for is scrambled eggs. So I love my Saturday mornings. There's plenty of time to prepare a hearty breakfast, and sip a nice mug of tea. Quinoa is amazing, and so versatile. Toss it together with some veggies, and a fried egg? Heaven. A healthy, allergy friendly breakfast that will give you the energy you need to start your day right. The best part, is that you can customize it to your taste!

Quinoa Breakfast Bowl
**Nut Free**

You Need:

  • Cooked quinoa
  • Your favorite vegetables
  • Salt
  • Pepper
  • 1-2 eggs (how hungry are you?)

First thing first. Rinse that quinoa. Rinse it good. Add rinsed quinoa into a pot of boiling water. The water level should be about 1-2 inches above the quinoa. Cover, and let cook on medium heat for about 20 minutes. Quinoa should be nice and fluffy.

Fluffy Quinoa
While that's cooking, wash and chop your veggies. I used mushrooms, corn, and spinach, because it was what I had. Broccoli is also great, sweet potato is a dream with quinoa, you can add some sauteed onion for flavor--whatever you like!

I wish I had a slapchop.

Drizzle some olive oil into a pan, and toss your veggies in. Salt! Pepper! Keep in mind, cooking times may vary depending on which veggies you are using. Cook the ones that need more time first, and you can add in the smaller foods as you go.

Some tasty greens

Once the veggies are cooked, set aside in a bowl. Mix quinoa and veggies together, and set mixture aside. Crack your eggs, fry 'em up, and serve on top of the quinoa/veggie combo. You can serve whole, or if you cooked the yolk through, slice it up! I like to add a little sriracha for heat! (What can I say, my dad taught me well.)

Fried Egg with salt, pepper, dill & paprika. 
YUM.

Sprinkle some Parmesan cheese on top if you want. Add a scoop of ricotta cheese, or goats cheese for a little bit of decadence. Enjoy!


I've got work tomorrow, so this afternoon, we'll be making my favorite on-the-go breakfast in preparation for the week. Happy Saturday, everyone!


Friday, October 10, 2014

A Family Favorite!

Growing up, the dinner table was where my family and I would come together. We ate together, no matter how much homework there was. Between my allergies and my picky brothers, it couldn't have been easy to come up with recipes that appealed to kids AND grown ups. But my mom somehow managed it, night after night. This recipe was (and still is) a family favorite! It's great for a quick week-night meal!

Rice Krispy Chicken
**NUT-FREE**

You Need:
Adjust measurements according to desired serving 

  • 2 boneless chicken breasts (on the bone/white/dark all work as well)
  • 1/2 cup vegetable or canola oil
  • 1 cup of finely ground rice krispies
  • Garlic powder
  • salt
  • pepper
  • paprika
Smash, or blend Rice Krispies into a fine powder. Pour into a bowl and add garlic, salt, pepper, paprika. Stir spices into mixture, and set aside. (Side note: My mom kept a Tupperware of this stuff in the spice cabinet. Just pour onto a plate, and you're set!)

Krispy Krums


Pour oil into a separate bowl.

If using boneless breasts, cut into individual sized pieces. Place chicken in bowl with oil. Chicken should be covered--if not, add more oil. 

Using a fork, remove chicken from oil and allow excess oil to drip off. 

Place chicken in bowl with Rice Krispy powder, and coat chicken in the powder. Cover a pan with tin-foil, and place chicken on foil. 

In the oven!

For a little extra fun, sprinkle some extra Rice Krispy powder onto the pan. Once you've coated all the chicken, pop it in the oven at about 350*F for about 15-20 minutes, depending on how thick the chicken is. If you're using meat on the bone, it will need a little more time. Cut into chicken to make sure it's done! 

Voila! This goes really well with spaghetti. Like, really well. Trust me.

Tastes like home. :)

And all those extra krispy crumbs on the foil? That's the scrape. My brothers and I used to fight over it. Enjoy. ;)


EpiPen!


Oreo Fudge Crumble

I love dessert. Probably because for most of my life, I haven't been able to *really* enjoy it. My philosophy is simple: If I don't read it, I don't eat it. So if someones not sure exactly whether that cookie dough was safe, and they've already thrown out the packaging...I just don't eat it. After college, I started baking my own desserts, and discovered a world of goodies.

Last night I needed a quick, easy dessert for a dinner party. My friends were already over, dinner was in the oven and I was out of time. So I threw together a sweet and simple, allergy friendly dessert. The best part? You only need three ingredients.


  • Oreos
  • Chocolate (hard to find allergy friend chocolate, but it's out there. I promise. Hershey chocolate chips should be fine!)
  • Butter
Toss some chocolate into a double boiler, and add about a half tablespoon of butter. Stir all the way to chocolaty heaven.


Next, put your Oreos in a baggie (I used two plastic bags to prevent tears/spillage), and smash your cookies!
smashing, baby.

Once your chocolate is melted and your cookies are crunched, pour the cookie crumbs into the chocolate. Stir together, pour into a tupperware (or molds, or cupcake tins...it's up to you!), and refrigerate for about one hour. 

Remove, cut, devour. 

There was more, but I ate it. 

That's it! Such a fast, easy, delicious treat. And it's totally nut free! Tonight, I share my favorite childhood meal. Tomorrow? Nut-free granola bars. Yeah, they're real. 


Hold the Nuts

Howdy, folks. If you're here, you're probably allergic to something and looking for advice, or maybe a good recipe. Or you love food. Or you love me. (Hey, Mom & Dad!) 

I've always been allergic to nuts. When I was three, a cookie almost killed me, and life's been a recipe-reading ride ever since. Around 12 or 13, I noticed that apples made my mouth itch. So did oranges, clementines and my beloved grapefruits. I was chased down the boardwalk by Mr. Peanut, and through the lunchroom by a kid with PB&J. In college, a banana made my tongue swell. The freshman 15 never happened for me, because I was too afraid to eat anything other than chicken, and/or veggies. My junior year, someone asked me (through her mouth full of birthday cake) what diet I was on, because I looked "totally amazing." My response? "The one where food is out to kill me."

I tend to have...ironic luck. When I wanted a room with a view, I got the ground floor apartment with a reception desk window. I love food, so of course I'm a bucket full of allergies. Of course. 

I have spent the past year of my life living abroad, where legumes roam free and barrels of nutty doom sit beside gorgeous treasure troves of tea. Where a walk through the market means, "hold your breath. don't touch that. don't buy that. don't eat that." 

I get crazy eyes when someone eats fruit in front of me. I imagine the explosion of juice, and eat vicariously through my friends. Eating healthy has always been a struggle for me. Without fruit, nuts, or seeds,  there are no safe/healthy "grab-n-go's" for me. Granola bars are off limits. Forget about trail mix. And fruit is an obvious no-no. People often ask me "what do you eat?"

This blog is a survival guide to life with allergies. Like...a lot of them. If you have allergies, I hope I help. If you love food, I hope you laugh. If you love me, well...then you probably already know everything I'm writing about. Onward! And please, hold the nuts.